Installing and Running Ubuntu Desktop on Google Cloud Compute: Tutorial for The Absolute Novice |

|
|
SHELL COMMANDS AT THE BOTTOM OF THIS DESCRIPTION:
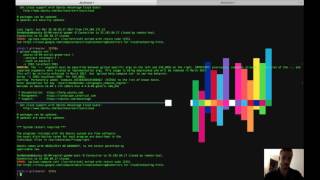
Starting from scratch, I quickly demonstrate how to download, install and configure the necessary components to run Ubuntu Gnome 3 Desktop (Flashback) on a Google Cloud Compute instance running the server version of Ubuntu 16.04.2 LTS (Xenial Xerus) and interface with it via VNC Viewer through an encrypted SSH tunnel. 1 - Creating and configuring a Google Cloud Compute instance. 2 - Updating Linux. 3 - Downloading and installing Gnome Desktop, autocutsel (to copy-and-paste) and TightVNCServer. 4 - Editing vncserver's xstartup file. 5 - Setting-up SSH tunneling on our local machine using the gcloud command-line tool. 6 - Installing Gnome-Shell and Gnome-Panel 7 - Adding some missing elements to the desktop and enabling right-click using the Gnome Tweak Tool. **COMMANDS** $ sudo apt-get update $ sudo apt-get upgrade $ sudo apt-get install gnome-shell $ sudo apt-get install ubuntu-gnome-desktop $ sudo apt-get install autocutsel $ sudo apt-get install tightvncserver $ touch ~/.Xresources $ sudo apt-get install gnome-core $ sudo apt-get install gnome-panel $ sudo apt-get install gnome-themes-standard $ sudo apt-get install adwaita-icon-theme-full adwaita-icon-theme $ gsettings get org.gnome.metacity theme $ gsettings set org.gnome.metacity theme 'Adwaita' $ vncserver -geometry 1024x640 $ vncserver -kill :1 **XSTARTUP FILE** #!/bin/sh autocutsel -fork xrdb $HOME/.Xresources xsetroot -solid grey export XKL_XMODMAP_DISABLE=1 export XDG_CURRENT_DESKTOP="GNOME-Flashback:Unity" export XDG_MENU_PREFIX="gnome-flashback-" unset DBUS_SESSION_BUS_ADDRESS gnome-session --session=gnome-flashback-metacity --disable-acceleration-check --debug & **LOCAL SHELL COMMAND** $ gcloud compute ssh \ YOUR INSTANCE NAME HERE \ --project YOUR PROJECT NAME HERE \ --zone YOUR TIMEZONE HERE \ --ssh-flag "-L 5901:localhost:5901" **GNOME DESKTOP INSTANCE SHELL COMMAND** $ sudo gnome-tweak-tool |